Ember.js is a client-side framework that aims at single-page applications. It has several tools to abstract the most common patterns.
The most used tool for running Ember apps nowadays is ember-cli, written with Node.js. It is the canonical way of running Ember apps, since the RFC formalizing the v2.0 release. But even with all these features, sometimes you just want to keep your workflow and use Rails.
In this article you’ll see how to set up Ember in a Ruby on Rails app, with testing support using QUnit.
Installation
First, install the latest stable version of node (version 0.12.x). To do so, either follow the installation instructions on nodejs.org or install it using brew. Once you’ve installed Node, you’ll need to install the ember-cli package globally; this will give you access to the ember command-line runner.
$ npm install ember-cli -g
$ ember -v
version: 1.13.12
node: 0.12.7
npm: 2.14.10
os: darwin x64
The next step is to install the latest version of the rails gem:
$ gem install rails
$ rails -v
Rails 4.2.5
Creating an Ember-ready Rails app
Create a new Rails project skipping bundle (we need to adapt Gemfile)
$ rails new ember-rails-example --skip-bundle
Now add the ember-cli-rails gem to the Gemfile Rails generated for us
gem 'ember-cli-rails'
At this point you can install the dependencies with bundle install. The ember-cli-rails gem provides a generator called ember-cli:init, that will basically create an initializer file. Go ahead and generate it.
$ rails g ember-cli:init
      create  config/initializers/ember.rb
You can use this initializer to setup your Ember apps. By default it’s configured to use an application called frontend that must live under Rails.root/frontend.
# config/initializers/ember.rb
EmberCli.configure do |c|
  c.app :frontend
end
Now you need to let Rails know which path you want the Ember app mounted to; to this purpose, you can invoke mount_ember_app in the routes file, like this:
# config/routes.rb
Rails.application.routes.draw do
  mount_ember_app :frontend, to: '/'
end
By default, routes defined by ember_app will be rendered with the internal EmberCli::EmberController. Such controller renders the Ember application's index.html and injects the Rails-generated CSRF tags into the <head>. For customization please follow ember-cli-rails documentation.
Creating the Rails-hosted Ember app
Everything we’ve done so far was configuring our Rails app. Now it’s time to generate the frontend Ember application. You’ll have to use the ember command for this. From your Rails app root directory, just type:
$ ember new frontend --skip-git
You also need to install the ember-cli-rails-addon NPM package. Do it from your Ember app directory.
$ cd frontend
$ npm install --save-dev ember-cli-rails-addon
Be sure that the addon's MAJOR and MINOR version matches the gem's MAJOR and MINOR versions.
Start it up!
We're now ready to start our app just like any other Rails app:
$ rails s
=> Booting WEBrick
=> Rails 4.2.0 application starting in development on http://localhost:3000
=> Run `rails server -h` for more startup options
=> Ctrl-C to shutdown server
[2015-03-12 16:50:13] INFO  WEBrick 1.3.1
[2015-03-12 16:50:13] INFO  ruby 2.2.0 (2014-12-25) [x86_64-darwin13]
[2015-03-12 16:50:13] INFO  WEBrick::HTTPServer#start: pid=6355 port=3000
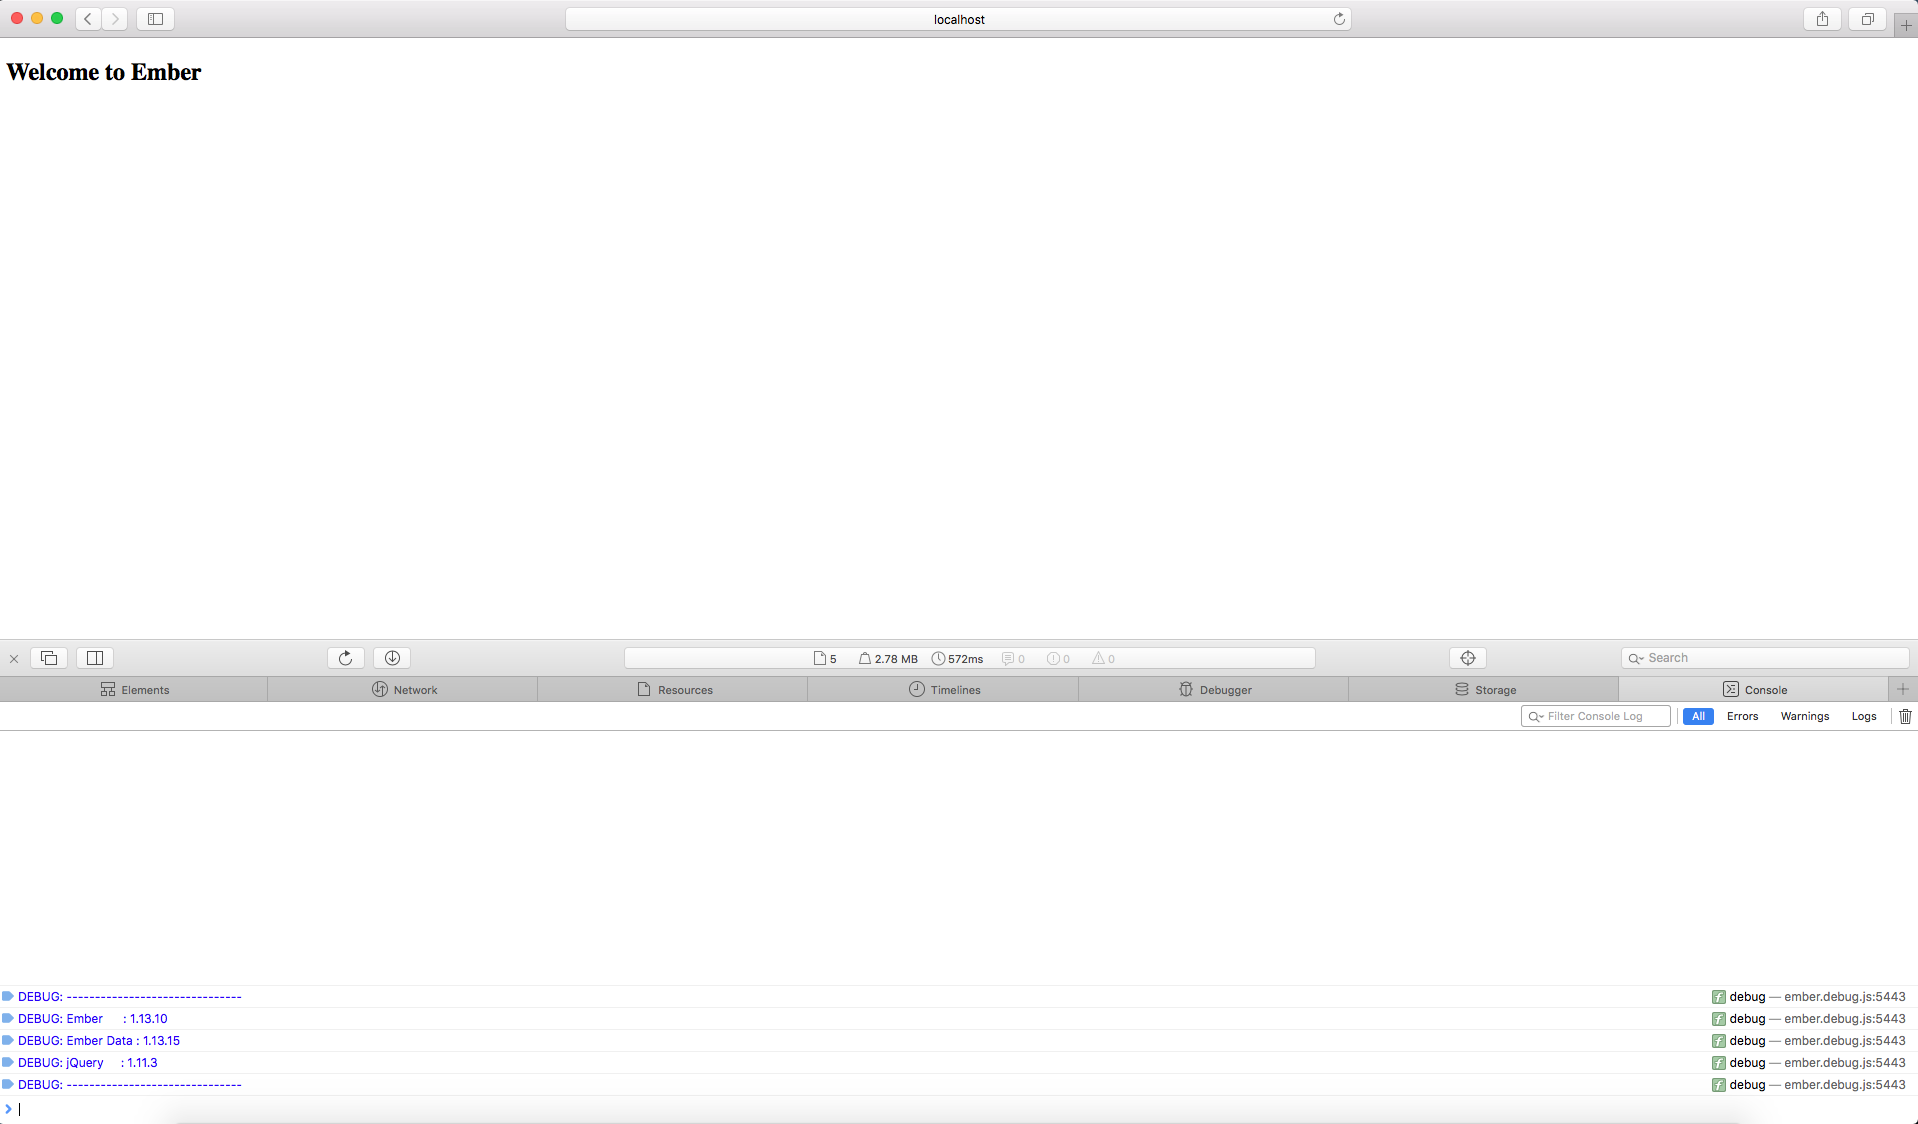
Start your browser and open Developers Console, then access localhost:3000 and if you see Ember stuff logged like this, then congratulations! You're successfully up&running with Rails+Ember!
Setting up Ember.js with Rails via @safeforge
Click to tweet